Paver Installation Technology
Learn about the essential stages of professional-level paver installation.
Prior to installation, the area must be thoroughly prepared in accordance with technical standards. It is also crucial that each stage of the laying process is strictly followed, as failure to adhere to these standards can cause damage to the paving tiles and design elements, leading to their rapid wear and tear.
Project Preparation
Project Preparation
It is essential to develop a plan and description for the area where the pavers and other additional elements will be installed, according to the following steps:
Determine the area of the space to be paved.
Determine the expected load for the surface (e.g., pedestrian, light vehicle, heavy-duty).
Assess the surface drainage conditions (longitudinal and transverse slopes) and the need for drainage systems.
Calculate the required quantity of pavers, curbstones, and other elements based on their type, color, and the project’s design.
Site Preparation
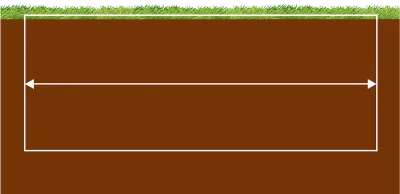
After marking out the area to be paved, you must prepare the ground by removing the top layer of humus and fertile soil. Any unstable soil should be further compacted before laying down geotextiles, and the ground surface must be thoroughly cleared of tree roots and plant debris. It is also important to prepare the soil base for the drainage system to achieve the desired permeability.
If necessary, you can build up the sub-base layer with coarse crushed stone. If the groundwater level is higher than the planned paving level, the water level must be artificially lowered by carrying out appropriate drainage work.
Site Layout and Marking
It is necessary to divide the area into separate sections using stakes or metal pins. You must also mark the finished level of the top edge of the pavers or curbstones. The slope of the surface is determined by the location of drainage lines, but a gradient of 1.5-2° is recommended, which corresponds to a fall of 1.5-2 cm for every 1 meter of length.
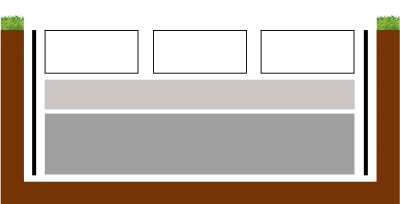
Next, to fill the excavated area, a layer of up to 10 cm of coarse gravel should be used, and the base of the area must be compacted using a special vibrating machine (a vibratory plate compactor).
Finally, the perimeter must be secured with curbstones or concrete supports, which will contain the area where the pavers are to be laid. For greater stability, the curbstones should be reinforced with concrete in several places.
Base Layer Preparation
For the first (base) layer, use a frost-resistant material such as gravel or crushed stone with a 5-70 mm aggregate size.
For areas that will be subjected to vehicle traffic, the thickness of the base layer must be determined based on the project’s specifications and the type of area being paved; it can range from 30 to 90 cm.
The base layer must be compacted in such a way that its initial thickness is reduced by 20%. This ensures proper durability and stability.
Laying the Paving Stones
Paving stones are laid on the fully prepared bedding course. This process typically starts along one edge of the area after the curbstones (edge restraints) have been installed in a straight line. The recommended direction for laying pavers is to work from the edges toward the center.
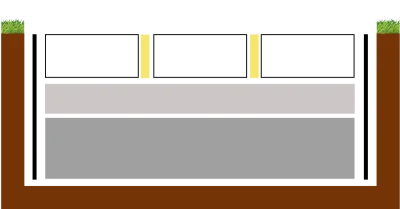
The height of the installation must be controlled using a guide string (string line) stretched across the surface to ensure the pavers are distributed at a uniform level. A gap (joint) of 3-5 mm should be left between each paver; this space should be filled only with sand. If the joints are being filled with a sand-cement mixture, the gap should be 8 mm. It is not permissible to lay pavers without leaving a space between them, as temperature changes and external forces can cause the edges to chip or break.
For areas intended for vehicle traffic, pavers should be laid at an angle to the direction of traffic (e.g., in a herringbone pattern). This ensures that loads are distributed evenly across each paver, reduces tire noise, and helps prevent the shifting and grinding of the laid pavers.
It is highly advisable to mix pavers from several different packs at once during installation. Due to the nature of the manufacturing process, there can be slight variations in color tone between different pallets. To achieve an even color distribution, it is best to mix pavers from at least three pallets simultaneously.
Please note: when a paver must be cut to fit, you should not cut off more than half of the original paver.
Filling the Gaps Between Pavers
After the installation is complete, it is necessary to fill the gaps (joints) between the paving stones. To do this, dry, washed sand with a fine 0-2 mm particle size should be spread across the surface and distributed evenly. This process gives the laid pavement its necessary density and stability.
Surface Compaction
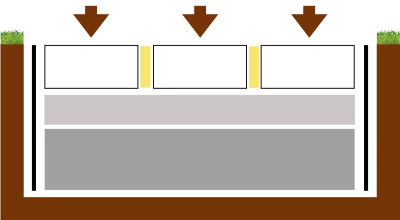
It is recommended that the finished surface be compacted using a rubber mallet. For paving stones, it is also permissible to use a vibratory plate compactor, provided it has a protective rubber pad (no more than 1 cm thick) attached to its base. The machine should weigh up to 200 kg and have an impact force of no more than 20 kN.
The compaction of the area should be carried out evenly, working from the edges toward the center, until the desired surface height is achieved and the concrete pavers have reached the necessary density. After this process is complete, it may be necessary to refill the spaces between the pavers with sand again.


